Sunday, December 29, 2013

"Toba" salmon from Hokkaido 北海道から鮭のとば

My mother, as usual, sent us a “care package” of food for the New Year. Among the items she sent was dried salmon called "Toba". Although I posted about "Toba" before, this batch is much better than what we had before and the shape is also correct. Quoting from my previous post
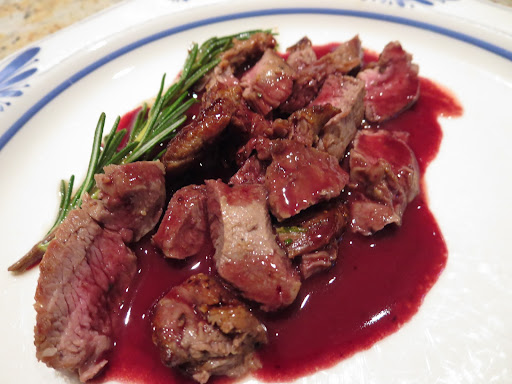
"Toba とば, written in kanji ideograms as 冬葉 which means "winter leaves". This is a famous item on my home island of Hokkaido. The name, I suppose, comes from the way the strips of salted salmon drying in the cold winter wind resembles brown leaves on the bare branches of trees. Traditional toba is usually very chewy, or sometimes hard like a strip of leather, and very salty. It is sort of the Hokkaido version of beef jerky. This version is considerably "tamed". The skin has been removed and it is cut into smaller pieces. In addition, somehow it has been made much softer, although it is still quite salty."

As you can see below it’s resemblance to narrow blades of a leaf is unmistakable.

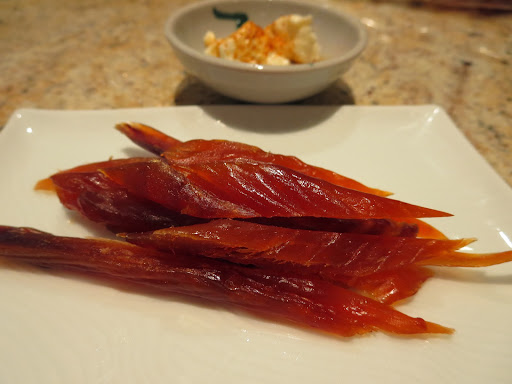
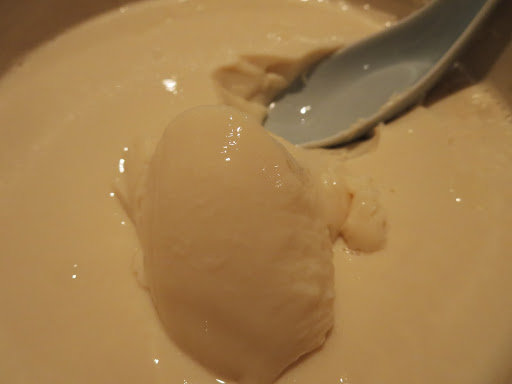
This one is also a modern version and is not too salty or too hard like traditional ones. Eating this brought back nostalgic memories of my youth. I remembered that when I was young and bar-hopped in Susukino すすきの,  these were usually served with mayonnaise, soy sauce and tougarashi (Japanese red pepper flakes) mixture as shown below. They were often even delivered to your mouth by an obliging hostess—although I am not sure that improved the flavor in any way.

This and other items came in a box proclaiming "True authentic gifts that only Hokkaidians* can give".

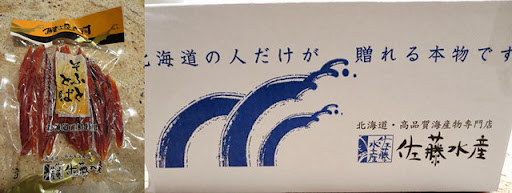
*I am not sure this is a correct Demonym for people of Hokkaido but people in Arcadia is Ardadians, people in Hokkaido could be Hokkaidians or other choice may be Hokkaidoites.

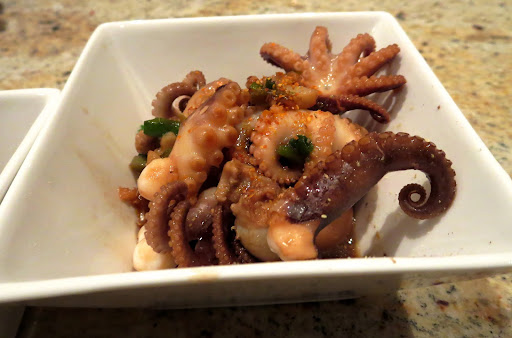
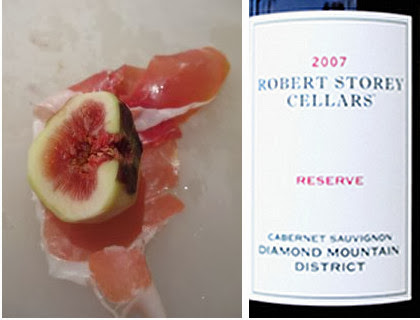
Last time, I succumbed to having this with scotch and water but this time we stayed with red wine. Although I have to admit it probably goes better with the scotch.

Thursday, December 26, 2013

Baby octopus braised in garlic butter and soy sauce 飯蛸のバター醤油いため

This was only the second time I saw raw wild caught baby octopus or "Iidako" 飯蛸 in the market and I bought them without hesitation. Although I call it "baby" octopus, it is not a baby or even the young of a large octopus species but just a variety of small octopus. We happened to stop by this market after work on the way home since we had some business to take care of at a near-by location. The last time I found small or baby octopus was at the same market. At that time, I posted grilled baby octopus which was good but a bit on the chewy side. To avoid letting squid or octopus get chewy, I need to cook it either very quickly or for a very long time. Since this was a weekday evening and I didn’t think they would last until the weekend, I did not have much time and I chose the quick approach.

Pictures of the baby octopus, raw, are shown below. (1 lb of which is more than enough for 2 servings as an appetizer). Luckily they were already cleaned and the "beaks" removed (It was a good thing. See this post - in Japanese- to learn how to clean it). After I salted and "kneaded" them in a bowl, I washed them several times with cold running water. Since the first picture (#1) does not show the individual octopus well, I fished one out and placed placed it on top for its portrait (#2). This was one of the larger specimens.

I first parboiled the octopus in rapidly boiling water with a dash of sake (to reduce the "fishy" odor) for 30 seconds (#3). I drained them and cut the larger ones in half or quarters and left the small ones whole. I set them aside.

I melted butter (2 tbs, unsalted) on medium heat and when the butter melted added finely chopped garlic (2 fat cloves). I sautéed for 1 minutes or so until the garlic was fragrant but not browned. I increased the heat and added the parboiled octopus and quickly sautéed for 30-40 seconds and added chopped scallions (3 stalks). I finished the dish with a soy sauce (1/2 tbs) and mirin (1/2 tbs) and cut the heat (#4).

I served them with a sprinkling of Japanese red pepper flakes or ichimi tougarashi 一味唐辛子 (the first picture). This time, the octopus were not tough or chewy at all. They were plump and pleasantly springy in texture which was very nice. They were remarkably fresh and the combinations of butter, garlic and soy sauce cannot go wrong. The mirin added just a slight sweetness to round up the dish. This was a perfect small dish for sake and we had new G-sake from SakeOne with this dish.

Monday, December 23, 2013

Proscuitto wrapped fig イチジクの生ハムまき

This dish was inspired by the menu at Suiko 酔香 in Tokyo. Although we did not order the dish, one of the items listed on the menu was "ichijiku no namahamu maki" イチジクの生ハム巻き or "Prosciutto wrapped fig"*. The group who sat next to us ordered this and I thought of making a similar dish.

* When we lived in California fig trees were all over the place and we could just help ourselves to the nice ripe sweet figs from the trees in our backyard. Probably because of better packaging, figs are now readily available, even on the East coast. But, once we ate figs in Japan, we realized we had not really tasted figs. On our last visit to Tokyo, we bought figs that were mostly from Aichi prefecture 愛知県. They were huge, almost the size of a small baseball. They were also juicy and delicious. One fig per person made a breakfast. We had never seen anything like it and bought them whenever we could. Although the mission figs in the US are quite good, we have never seen the equivalent of the Japanese figs here.

I made two versions of figs and prosciutto. The one shown below is the second one I made. It was better than the first one (the second picture).


Figs: I used Mission figs; one per serving. I peeled the skin and quartered it. Using a half length of Prosciutto, I wrapped the fig. I placed fresh goat cheese on top and put a toothpick through (to hold it together). I drizzled good fruity olive oil and aged (syrupy) Balsamic vinegar over it. I also added freshly cracked black pepper. These additions definitely improved the dish.

The picture shown below was the fist version in which I wrapped half of the peeled fig with a full length of Prosciutto.


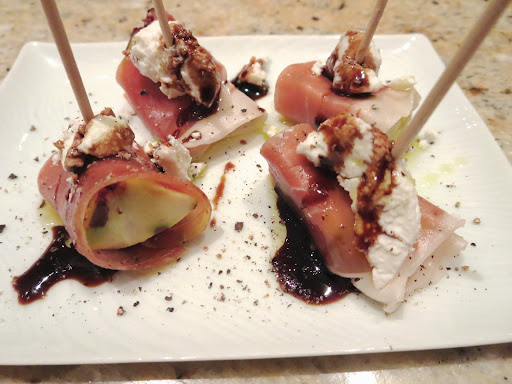
The first version was a bit too large to eat in one bite. This particular  prosciutto was not the best--a bit tasteless, although the almost sweet tasting balsamic vinegar combined with the sweetness of the fig was nice. The goat cheese, black pepper, olive oil plus the smaller size of the second version made the dish easy to eat and gave it more flavor dimensions.

This dish went particularly well with the California red (Robert Storey Cab 2007 from Napa) we were drinking.

Friday, December 20, 2013

Potato salad with pickled myouga and rakkyo らっきょうとミョウガ入りのポテトサラダ

You may not think potato salad is  Izakaya cuisine but it is one of the most popular items especially as "Otoushi" おとうし. The Japanese version of potato salad is a bit different from the usual American versions, however. For example, the potato salad served in Suiko 酔香 had smoked picked daikon called "Iburi-gakko" いぶりがっこ which gave a unique smoky flavor and crunch. The last time we were back in Sapporo visiting my mother, she added rakkyo らっきょう to her potato salad saying she usually did not have cucumber pickles. We really liked the addition of rakkyo. Rakkyo is cross between scallion and small onion and is usually served as a condiment for a Japanese curry.

For the version below, I added chopped pickled myouga and rakkyo (in sweet vinegar from a jar) to my usual potato salad instead of cornichon. I also added fresh cucumber sliced, salted and dressed with sushi vinegar just before serving. Although thinly sliced fresh cucumber is often included in Japanese potato salad,  I usually do not add it because I am concerned that the cucumber could go bad before the other items in the salad.

I added skinned and sliced tomato arranged in rose shape with seasoned with salt and pepper and a dab of mayonnaise.

In an other version I garnished it with pickled myouga and rakkyo.

Or, served just as is.

We rather like these variations. Both rakkyo and myouga add unique flavor and texture to my potato salad, a perfect small dish to start the evening.

Tuesday, December 17, 2013

Sweet potato croquet さつまいものコロッケ

When we barbecue chicken in the Weber grill, we often make baked sweet potato. My wife mashes it and seasons it with butter and soy sauce. We had some of this mashed sweet potato and barbecued chicken left over from our last barbecue. I came up with  this dish as leftover control.

I served these croquets with Montparnasse cauliflower,blanched broccoli, shredded cabbage and skinned thinly sliced  tomato arranged  to look like a rose flower. I served Tonkatsu sauce and Japanese hot mustard on the side.

2013-11-07 18.43.53 (2)

The amount below makes about 4 croquets.

Mashed sweet potato: about 1 cup
Onion: small or half of a medium, finely chopped
Chicken: cooked thigh meat, finely chopped about 1/2 cup
Panko bread crumbs:
Egg:
Curry powder (optional)

I sautéed the onion until soft in light olive oil, added the chicken, curry powder. I let it cool down a bit and mixed it with the mashed sweet potato. I made 4 flat oval shaped discs. I dredged them in flour, egg water and Panko bread crumbs.  I placed them in the refrigerator for several hours before frying.

This time I deep fried the croquets in 350F vegetable oil, for 2-3 minutes turning once (all the ingredients are cooked so you just want to make a crunchy crust). I could also have "shallow" fried them.

For leftover control, this is not bad at all.

Saturday, December 14, 2013

Venison tenderloin with juniper berry, rosemary red wine sauce 鹿肉のワインソース添え

One of my friends went deer hunting and bagged a "Bambi" (or more likely a yearling. He said it did not have white spots) and gave me a small piece of tender loin. Since the meat was small  and irregular in shape rather a medallion, I made this quick small dish with a crushed Juniper berry and fresh rosemary wine sauce as an appetizer. I did not follow any particular recipe for this. (By-the-way the red liquid in the picture, is the sauce).


Venison: I just seasoned it with salt and pepper and cooked it in a frying pan with olive oil for few minutes and let it rest on a plate covered loosely in aluminum foil. Just before serving, I cut it into bite sized pieces. The center was slightly pink.

Sauce: Since we had a half open bottle of an unusual (for Spanish wine) red blend called Pago de Larrainzar Navarra Red blend 2005 (blend of Merlot, Cab, and Tempranillo), I decided to use this for my wine sauce. This wine (appears to have some problems with corks) did not taste great to our palate but we deemed it good enough for a wine sauce. I did not have any shallots, so I used a small onion instead, finely diced. I sautéed it in melted butter using the same pan in which the venison was cooked. After the onion got soft, I added crushed juniper berries (2) and finely chopped fresh rosemary (one small sprig). I added about 1/2 cup of the afore-mentioned red wine and reduced it to just coating the bottom of the pan. I finished the sauce with pats of butter. I seasoned it with salt and pepper and poured it over the meat thorough a fine meshed strainer.

The venison was very tender and not too gamy. The wine sauce went very well. Of course, for this dish, we needed to open a decent red. B cellars Blend 25 2006 from Napa was a bit usual from Napa since it is a blend of Cab (68%) and syrah (32%) like some Aussie wines. This one got 91 from WA. We liked this wine and it was a perfect match for the venison.

Wednesday, December 11, 2013

Blackened Brussels sprouts and chestnut salad 黒焼き芽キャベツと栗のサラダ

Although I posted blackened Brussels sprouts salad before, we made some variations after Thanksgiving when we made blackened Brussels sprouts. This was also inspired by the dish we had recently at Nojo restaurant.

The first picture below is a combination of baked chestnuts and blackened Brussels sprout seasoned with a bit of syrupy balsamic vinegar and Japanese red pepper flakes (Ichimi tougarashi 一味唐辛子). The addition of chestnuts is my wife's idea. We took a short cut and used whole roasted chestnuts in a jar.


This one is placed on the bed of baby arugula and dressed with a mixture of soy sauce, balsamic vinegar, Japanese red pepper flakes.


Making blackened Brussels sprout cannot be easier except for the preparation of the Brussels sprouts which is a bit tedious.

Wash and cut the bottom to remove outer (blemished) layers. If large, I cut them into half or quarters (to increased the surface which can get blackened).
Place the prepared Brussels sprouts in the bowl, add enough olive oil to coat the Brussels sprouts.  Then sprinkle on salt and pepper and toss to coat. Spread the Brussels sprouts on the cookie sheet with cut side down and bake it for 45 minutes in a preheated 375F oven (#1).
Add the prepared chestnuts (cut in half or quarters) for the last 15 minutes or bake the chestnuts for 15 minutes separately (#2) then mix into the blackened Brussels sprouts  (#4).

I made the dressing (#3) which is a mixture of balsamic vinegar, soy sauce, honey and olive oil. Later we tried just a small drizzle of a good syrupy Balsamic vinegar and red pepper flakes. The latter was as good or even better. So I would not bother to make a dressing.


This dish is very good cold or room temperature, although hot out of the oven is the best. It does heat up nicely in a microwave oven as well.

I did not imagine I would say "I love Brussels sprouts" but I do now.

Sunday, December 8, 2013

"Nuta" salad from frozen yellow fin tuna 冷凍キハダマグロのぬた

Although I have posted a similar dish before, I made a slight variation from my usual recipe when I recently thawed a block of frozen yellow fin tuna. (As I mentioned this frozen tuna is my emergency tuna supply which I keep in the freezer). The quality of the tuna is not good and requires some effort to make palatable. Here I made “nuta” salad with “yubiki” tuna, blanched greens of scallion, wakame seaweed, cucumber and nagaimo with vinegar miso dressing.


One of the reasons I made this dish was that we had a similar dish (made with better quality tuna) at Kappa in San Francisco.

Block of yellow fin tuna: I used about 1/3 of the block. After thawing, I put the block in boiling water with a dash of sake for 10-15 seconds until the surface turned white all over. I then put it in ice water. After 30 seconds, I fished the tuna block out of the water and patted it dry with a paper towel. I cut the tuna into bite size cubes.
Scallion: I only used the green part of the scallion (4-5 stalks), I cut them into 1 inch segments and blanched them for 1 minute, then soaked them in ice water and drained.
Wakame seaweed: I used salted and frozen wakame (not dry one). I washed it to remove the salt and soaked it in cold water for 10-15 minutes to hydrate. I cut it into short segments.
Cucumber and Nagaimo: Both were cut into small dices (skin peeled from nagaimo).
Dressing: This is my usual karashi sumiso dressing.
This low- quality frozen yellow fin tuna tasted quite decent in this dish.

I also made “Namerou” of tuna with garlic, ginger, scallion and miso (above) which was quite palatable with sips of cold sake.

I also made “Yamakake” using the remaining block of tuna. I marinated the small cubes of tuna in a mixture of sake and soy sauce in the refrigerator for a few hours prior to serving.

With these three dishes, we finished the entire block of yellow fin tuna.

Thursday, December 5, 2013

"Yuba" tofu 湯葉豆腐

I saw this recipe on the Internet. Since my attempt at making tofu from store bought soy milk was somewhat less than successful and a bit more work than warranted by the end product.  The idea of making a tofu-like dish using gelatin and soy milk appealed to me. This was very simple to make and the texture was great. The original recipe called for thinly sliced fresh okra as a garnish. Since I did not have fresh okra, I used "pickled" okra instead (below).

Here is another version of the garnish; finely chopped scallion, nori strips and a dab of yuzukosho and Ponzu sauce.

I am just translating from the original recipe. This will make very generous servings for two.

Water 2 Tbs
Gelatin powder 4grams
Soy milk (unsweetened and un-flavored) 360ml
Salt a small pinch

I mixed water and gelatin in a small cup and let it sit for a few minutes. I put the store bought non-sweetened and non-flavored soy milk and salt in a small sauce pan on a low flame until it started just gently boiling. I cut the flame and mixed in the gelatin bloomed in water. I mixed well and dissolved the gelatin. I poured the mixture into a small Pyrex baking dish. When the mixture cooled to room temperature, I covered it with plastic wrap and placed it in the refrigerator overnight.
The next day, I scooped it out into a serving bowl and garnished with sliced pickled okra and poured Ponzu sauce (from a bottle) on top.


This has a nice smooth mouth feel and is quite good. The first few bites had a subtle almost vanilla flavor (even though the soy milk was supposedly unflavored). Probably I should use fresh instead of pickled okra. The pickle was a bit too strong relative to the very delicate soybean flavor of the dish. The dish I garnished with scallion and nori strips and yuzukosho was better. I think this is almost like silken tofu (the texture is subtly  different, though) and much easier to make than real tofu from store bought soy milk.

Monday, December 2, 2013

Chicken breast, pickled myouga salad 鶏肉、冥加甘酢サラダ

This is a small starter dish I made from leftovers and it was not bad.

I made a sautéed chicken breast a few days ago using a technique I saw on-line which results in a very moist chicken breast when cooked. Essentially, the chicken breast was cut into bite sized pieces. It is then pounded to break some of the muscle fiber and then kneaded with a small amount of "shiro-dashi" 白出し, sake and potato starch. It is left to sit for 10-15 minutes. I then pan fried both sides. It appears the chicken breast was more flavorful and more moist than when cooked by other methods but any cooked chicken will do for the salad I am describing here..

CIMG6068

For this small salad, I added the cooked chicken. I also cut American mimi-cucumber in snake belly or Jabara 蛇腹 and then cut into 1 inch chunks. I finely chopped pickled myouga 茗荷. I mixed the chicken, cucumber and pickled myouga and dressed them with  some pickling sweet vinegar. I placed baby arugula on the bottom of a shallow glass bowl, I placed the mixture of  the chicken, cucumber and myouga on top. I also placed a dab of "moromi-miso" 諸味味噌 and garnished it with a pickled myouga.

Each items has its own flavor and the gentle taste of sweet vinegar was complimented by the nutty, sweet and slightly salty flavor of moromi miso.