Showing posts with label Tsukemono. Show all posts

Saturday, November 18, 2023

11 (or 12) Appetizers 11種類の酒のつまみ

This is another version of multiple small appetizers dishes. I used the divided plate with space for 9 dishes. But I had more than nine to serve so I doubled up in the divided space.  But I still needed to add two more small bowls for a total of 11 small dishes. If you count each part of the doubled up item (lotus root tsukune 蓮根つくね was divided and served with quail eggs and ginko nuts) (bottom row left and center), it would be 12 appetizers. None of them are new recipes. Even though the single portion is small, we were quite full after working our way through 12 of them.


To highlight a few the one shown below is Name-take mushroom なめ茸 (top row right),


simmered taro “satoimo” 里芋 potato and carrot with “Kouya-dofu” 高野豆腐* and sugar snap スナップ豌豆の塩びたし (middle row right)


and two small bowls; tofu and shimeji with oyster sauce 豆腐としめじのオイスターソース(top),


simmered shirataki and deep fried tofu 白滝と油揚の煮物 (bottom).


*Kouya-dofu is freeze dried tofu (for preservation I suppose) which creates unique texture and absorbs whatever liquid it is cooked in.

These appetizers are mostly comprised of vegetables and provide so many different textures and tastes. We really like this type of classic Japanese multiple appetizers.

Wednesday, October 25, 2023

Marinated “Tsukemono” Daikon 大根漬物

We got 2 medium size daikon from Weee. From half of one daikon I made two dishes; tuna and daikon ツナ大根 and dried persimmon and daikon in sweet vinegar 干し柿の大根なます. I made this dish from the other half. This is a type of tsukemono 漬物 (salted/pickled vegetable) but it uses quite a large amount of sugar besides salt and vinegar. When I saw this recipe on-line, I was a bit skeptical about the result but this is surprisingly good and we finished half a daikon in two sittings. I used frozen Yuzu citrus zest as well (see below).


I have seen similar recipes in which both salt and sugar were used but this one appears simplest.

I converted the Japanese tbs=15ml and tsp=5ml to grams but this may have increased both the sugar and salt amount as compared with the original recipe but it still came out OK.

Ingredients:
1/2 medium-size daikon radish, peeled, cut in half,

Marinade
25ml rice vinegar
15grams salt
120grams sugar
10 ml sake
Yuzu zest

Directions:
Mix the marinade. The amount of sugar is quite large and the marinade is slush rather than liquid
Add the marinade and the daikon into a Ziploc bag, remove the air as much as possible
Put it in the refrigerator, turning once or twice a day. After a few hours, the moisture from the daikon made the marinade completely liquid and clear (see below)


This dish was subtly very appealing; slowly growing on you. The daikon had a very pleasing crunch; not the hard not too soft. The slight sweetness of the sugar contrasted with the slight sourness of the vinegar and completely permeated the daikon. The original daikon spicy flavor peeked through at the very end of the bite. The added Yuzu zest was like icing on the cake adding yet another dimension of citrus. No wonder we consumed the whole thing in only 2 sittings.

Friday, August 4, 2023

Quail egg fry and Scotch eggs うずらの卵の串揚げとスコッチエッグ

We started using quail eggs ウズラの卵 from fresh eggs that we boil rather than using canned ones since the quality is much better. We can get fresh quail eggs from three sources; 
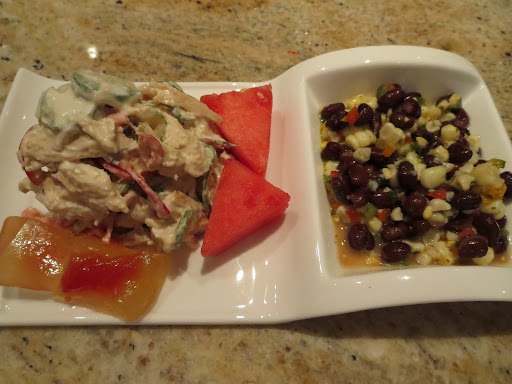
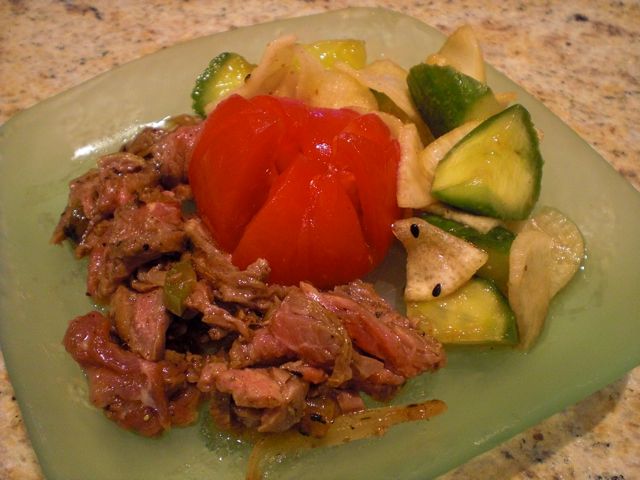
Weee on-line Asian grocery delivery service, our local Japanese grocery store (not always) and Whole Foods. Fresh quail eggs have their own problems, however. 1. It is difficult to judge if any eggs are cracked unless it is leaking the white or otherwise quite obviously damaged, 2. while boiling some quail eggs develop the cracks and 3. It is not easy to peel the shell without taking off some of the white. So the yield is 70-80% on good days. In any case, we got a dozen eggs and ended up with 10 boiled quail eggs (that is 83%!). I made mini Scotch eggs with the quail eggs and ground chicken. I also made “fried boiled eggs” (i.e. boiled quail eggs that are breaded and then deep fried). As a starter for one evening, I served half a Scotch egg, fried boiled quail eggs, fried shrimp heads from our Tako Grill take out and marinated or “zuke” tuna and hamachi sashimi. As a vegetable, I served “
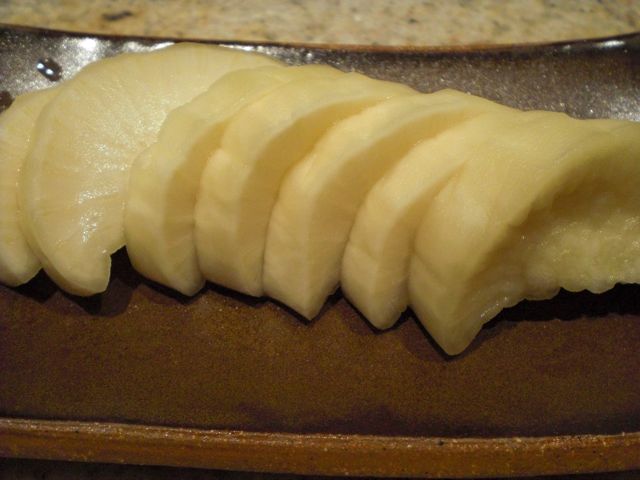
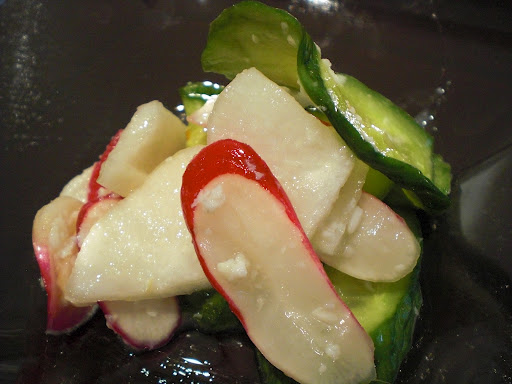
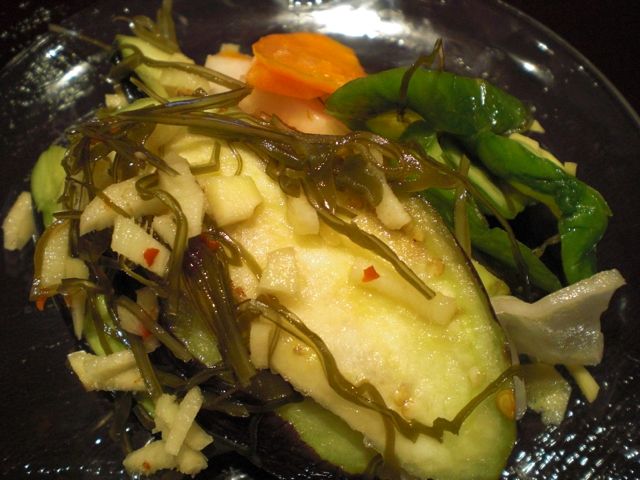
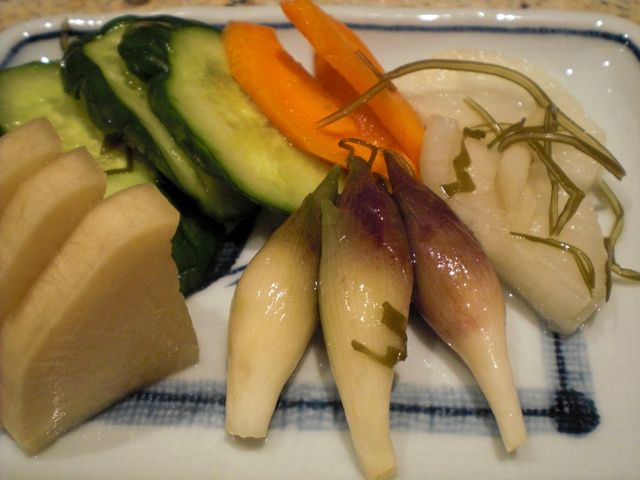
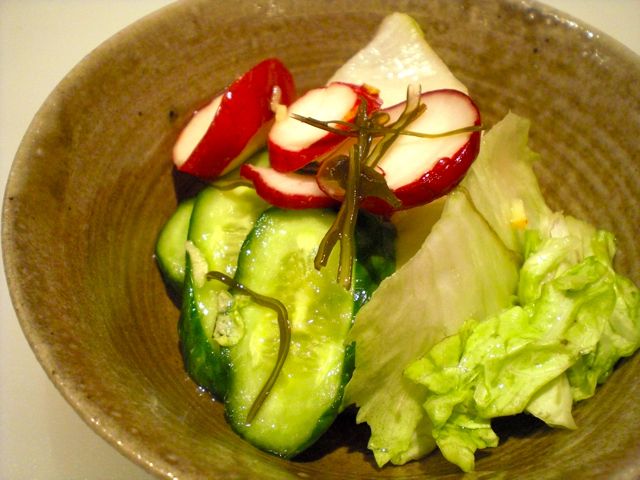
asazuke” 浅漬け of cucumber, nappa, daikon and carrot. I initially served with green tea salt and wedge of lemon. My wife requested “Tonkastu-sauce” as well.


I skewered two fried quail eggs with a tooth picks (shown under the shrimp head) emulating “Kushi-age串揚げ, Japanese breaded fried items on skewer, which is a classic Izakaya item.


How to prepare boiled quail eggs:
Add quail eggs to a pan of cold water on medium flame, as the water gets warmer, gently start stirring the water which helps to center the egg yolks. Once the water starts boiling turn down the flame and boil for 3 minutes. Immediately cool in ice water

Quaril egg Scotch egg:
Ingredients: Made 5
8 oz ground chicken (or beef or pork)
5 boiled quail eggs
1/2 medium onion, finely chopped
2-3 shiitake mushrooms, finely chopped
freshly grated nutmeg, black pepper and salt to taste
1 tbs olive oil
2 tbs Panko bread crumbs

For breading
Flour or potato starch
1 egg beaten mixed with 2-3 tbs water
Panko bread crumbs
Peanut oil for deep frying

Directions:
Sauté the onion and mushrooms in olive oil for 2-3 minutes, let it cool to the room temperature
Add ground chicken, panko and the seasonings, mix well and knead by hand (if too loose add more panko and/or potato starch).
Coat each quail egg in potato starch
Divide the meat mixture into 5 parts and make an oval 1/3 inch thick on your palm.
Place the egg in the center and encase it with the meat mixture to make an oval sphere (or ellipsoid)
Bread the sphere by coating in the potato starch (or flour), the egg water and the panko bread crumbs
Deep fry at 180F for about 5 minutes or until the bubbles become small
Cut in half and serve

This was quite good. The fried quail egg had a nice crunchy outside and the inside yolk was velvety smooth. The overall flavor was very nice too. It would have been easy to eat many more. The little Scotch egg was just the right amount as an appetizer for us. (We find the Scotch eggs made with regular hens eggs are too big.

Saturday, March 4, 2017

Marinated "Kyu-chan" cucumber きゅうりのキューちゃん

When it comes to cucumbers we much prefer Japanese cucumbers. While not large, they have a rich cucumber flavor and nice crunchy texture. They are quite different from American cucumbers which are large with a thick skin, generally tasteless, and watery. While we really like Japanese cucumbers, they are hard to come by. Sometimes, they are available at the Japanese grocery store but we never see them in the regular grocery stores. In desperation, we even tried growing our own only to discover the existence a nasty insect that snacks on the growing plant and infects it with a bacteria that eventually ends up killing the entire plant. It was heartbreaking to watch perfectly healthy growing plants wither and die just before the ripening cucumbers could be harvested.


For a while, we used English cucumbers, which were much better than the American variety. Several years ago, however, we switched to "mini-cucumbers" when they started appearing in our grocery stores. Although, not as good as Japanese cucumbers, they are the closest thing we can have to the taste and texture of a Japanese cucumber. They come 5 to 6 in a package and it is not easy to use them up before they go bad. So making cucumber salad or pickles is a good means of inventory control. As a result, I am always looking for new pickle recipes. I saw this recipe and decided to try it.

This is called "Kyuri-no Kyu-chan" きゅうりのキューちゃん and appears to reproduce a 
popular commercial product of the same name. I have not tasted or seen the commercial product. It is described on the company's website as first being salt pickled, then washed and soaked to remove excess salt, finally, marinated in a secret marinade (of a special soy sauce mix) with ginger. According to the website, all the processes are temperature controlled (i.e. chilled). Interestingly, all homemade recipes I found use hot (temperature) marinade. In any case, this is the result.


This is after 2 days of marination. The cucumber pieces have gotten darker in color.


The below is the first day after it was made.


Ingredients:
Cucumbers, 6 American mini-cucumbers (see picture below), washed, cut into half inch thick rounds.
Kosher salt

For marinade
Soy sauce 80 ml
Concentrated noodle sauce 20ml
Sugar 1 tbs
Rice vinegar 2-3 tbs
Mirin 2tbs
Ginger, thin julienne, 1tsp
Japanese togarashi red pepper 唐辛子, whole, cut into thin rings, seed removed

Directions:
1. Salt the rounds of cucumber and let them sit for 30 minutes. Wash and pat dry.
2. Place the marinade ingredients in a pan and bring to a boil. Cut the flame and add the cucumber (see below).
3. Let it sit until cooled to room temperature.
4. Remove the cucumber and set aside. Turn on the fire and let the marinade come to a boil.
5. Repeat 2, and 3 three times.
6. Add the ginger and red pepper in the last marinading step.
7. Let it cool to room temperature then place it in a sealable container.


Initially, the marinade appeared too small for the amount of cucumber but the liquid coming out of the cucumber made the marinade more than enough. According to the recipe, the tastes gets better amalgamated after 2 days in the refrigerator.


Although we have never tasted the commercial variety, we really liked this pickled cucumber. It still had a nice crunchiness. The taste was sweet, sour and salty with hints of heat and ginger making this a pickle with a complexity of flavor. We had this as is for a drinking snack but I am sure this will go well with rice.

Friday, August 1, 2014

Pickles Japanese style 日本風ピクルス

To preserve vegetables, Japanese usually salt them (with or without fermentation) called "Tsukemono" 漬け物. Although Japanese use vinegar and rice vinegar is the best kind of vinegar I can think of, "true" pickling appears not to be traditionally done. More recently, however, quick pickles appear to have gained popularity. Since I had leftover Japanese cucumber and daikon, I decide to make a quick pickle. Also since my wife mentioned that she liked "pickled" boiled eggs,  I also threw in some boiled quail eggs (from a can). (Pickled eggs are a Pennsylvania Dutch delicacy that my wife ate frequently as a child. They are hen eggs pickled and usually dyed red with the addition of beet juice to the pickling medium),


For color, I also added thin slices of carrot.


Recipe is rather simple. For the pickling liquid I used a Japanese sweet vinegar.

Sweet vinegar 甘酢:
Rice vinegar 300ml
Sugar 50g - 70g
Salt 1/2 tsp - 2 tsp

I placed the above ingredients in a small sauce pan, stirred to make sure the sugar and salt dissolved and let it come to gentle simmer for a few minutes. I let it cool down and kept it in the refrigerator. It lasts a long time (forever???). Depending on your taste, sugar and salt may need to be adjusted. In general, in hot summer, less sugar more salt and cold winter more sugar and less salt.

I added a few spices--thinly sliced dried Japanese whole red pepper (one, after hydrating to keep it from shattering when sliced), whole black pepper corns (4-6) and bay leaves (2)  to make a pickling liquid. I did not add any water because liquid exudes from the vegetables and eventually dilutes the sweet vinegar anyway. I cut the Japanese cucumber into small bite sized chunks ("rangiri" 乱切; cut obliquely as you rotate the cucumber in about 1 inch length), daikon in half inch cubes, and carrot thinly sliced and, boiled quail eggs from a can.

After a few hours in the refrigerator, it was ready. It was nicely refreshing and crunchy. Perfect for hot summer. We ate this as a starter with sake. My wife particularly raved about the quail eggs. They were nice little bites with creamy yolks lightly vinegar in flavor.

P.S. Later I made this using American mini-cucumber. Although, the Japanese cucumber stayed crunchy even after several days in the vinegar, the American cucumber became a bit mushy. I may have to try this with an American pickling cucumber if I can find one.

Friday, March 7, 2014

“Nagaimo” marinated in garlic soy sauce 長芋のニンニク醤油漬け

I made this marinated Nagaimo 長芋 dish before my hand surgery and forgot to post it. I saw this recipe on the Internet (in Japanese). I made it and placed it in the refrigerator and promptly forgot it (old age). So this had been marinating for at least 4 days which made it a bit strong but it was quite a nice dish with sake or even white rice.

IMG_1457

I followed the recipe but substituted "shochu" 焼酎 for white rum.

Nagaimo, skinned and cut in half lengthwise, and placed it in a ziploc bag (The amount is arbitrary).

Marinade: Garlic, thinly sliced (1 clove), dried Japanese red pepper, seeded and sliced (1, or red pepper flakes), soy sauce (3 tbs), rice vinegar (1/2 tbs), shochu (or white rum)(1/2 tbs) and dried kelp (about 1 inch square).

Pour the marinade into the Ziploc bag with the Nagaimo and remove as much air from the bag as possible so the nagaimo is completely bathed in the marinade.

I served this as a small drinking snack and also added the marinated kelp thinly julienned on the side. This is good with a nice crunchy texture. Because of the garlic, and length of time it was marinated it was rather strong. We would have preferred a shorter marinating time but as it is, it may be a good accompaniment with a white rice.

Tuesday, August 20, 2013

Pennsylvania Dutch pickled watermelon rind ペンシルバニアダッチ西瓜の皮のピクルス

One day, my wife asked me to get a watermelon. I brought one back from the grocery store and it sat on the counter for a few days. As I was getting ready to cut it up, my wife informed me that she wanted the watermelon for its rind not the fruit! She was going to make Pennsylvania Dutch watermelon pickles. .
As I have mentioned before my wife grew up in the Pennsylvania Dutch area of Pennsylvania so Pennsylvania Dutch food was part of her childhood.  She claimed that this type of pickle was served everywhere including school lunches. So, to my surprise, my task was to remove the outermost hard green skin and leave just the white of the rind and maybe a little of the pink from the fruit. (My wife told me that there is controversy about whether or not to leave any red of the fruit. We decided to leave the red.) It was not as easy as you think to remove just the green skin from the rind of a watermelon, but I used a technique similar to skinning the filet of fish.
After consulting  a few Pennsylvania Dutch cook books, she decided on one of the recipes from a 30 year old cookbook called “Pennsylvania Dutch People’s Cookbook”.

I served her watermelon rind pickles with chicken salad (made from chicken hot smoked in the Weber). I served the pickles with watermelon and corn and black bean salad using the new plate/bowl combination we acquired on our recent visit to New York.

My wife took over from here.
Watermelon Rind: 2 pounds of prepared rind with dark green skin removed. Dissolve 1/2 cup of salt in 2 quarts of water. Add the rind to the brine, cover and let stand overnight. (First picture below). Next day drain off the salt water. Put the rind in a sauce pan and cover with fresh water. Cook until the rind is just tender when pierced with a fork. Take off heat and let stand for several hours. Drain thoroughly.
Pickling syrup: 1 tsp. whole allspice, 1 tsp. whole cloves, 1/4 tsp. mustard seed, 1 stick cinnamon, 1 cup rice or sushi vinegar, 2/3 cup water, 1 cup sugar
Put all the syrup ingredients in sauce pan (the recipe calls for putting the spices into a cheesecloth. I just add them loose to the pan). Boil the vinegar spice mixture uncovered stirring occasionally for 5 minutes. Then add the drained rind and cook gently until the rind becomes transparent. (picture below).

My wife did not can the pickles but used them as “refrigerator” pickles so when they cooled she put them in a plastic container in the refrigerator.
They are a very sweet pickle with a strong flavor of the spices. They have a very pleasing soft but not mushy texture. My wife told me you either love or hate these pickles. I fall into the latter category and she falls into the former. I just found the flavor too strong—I found the flavor of cloves overwhelming. In contrast, she reveled in the strong sweet flavor. She said it reminded her of her childhood. She asked me what I would like to have changed. I suggested not so sweet and less spices. She replied that then they would not be watermelon pickles.
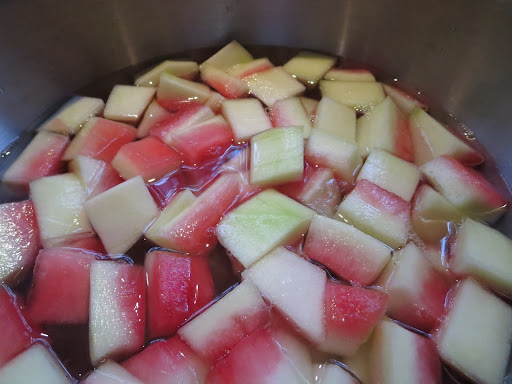
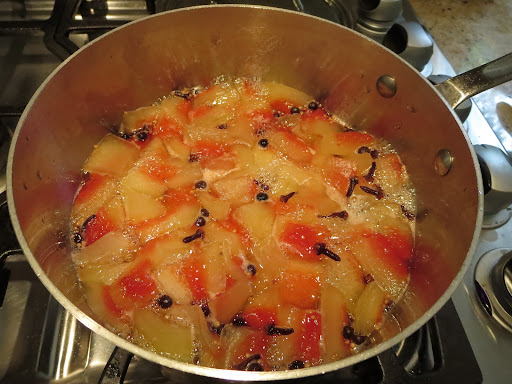
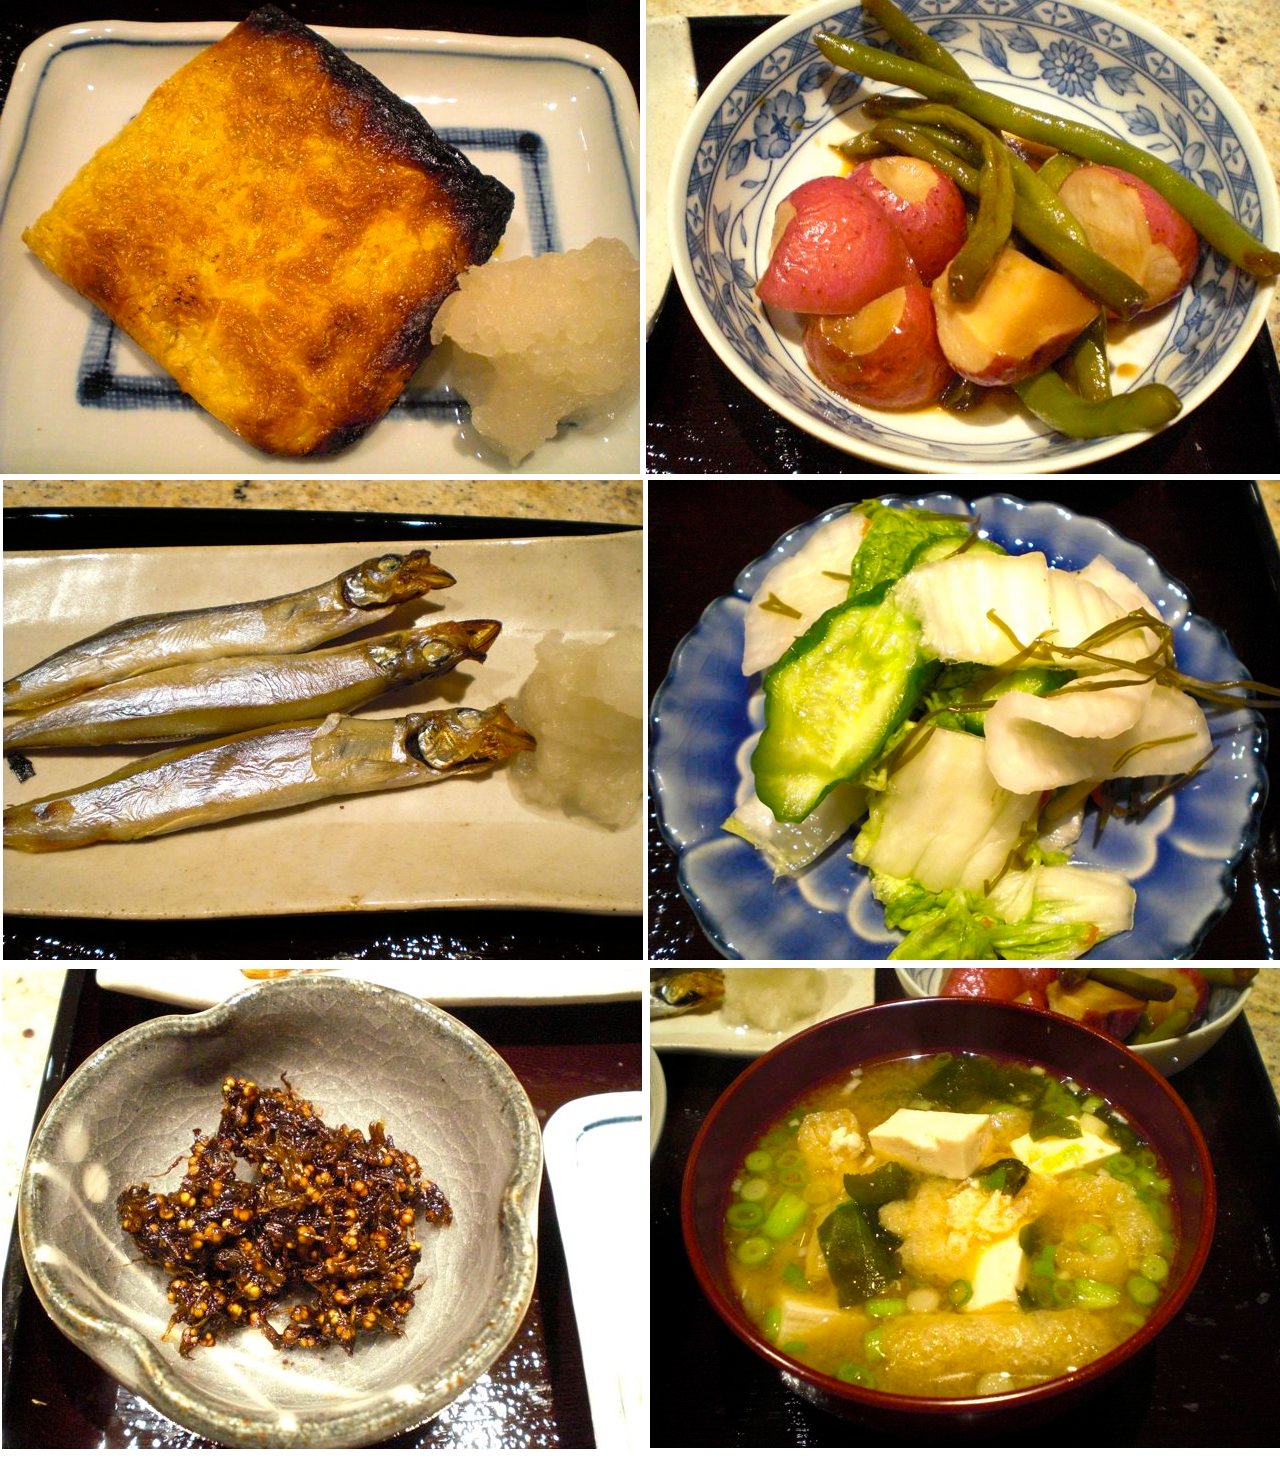
My wife pointed out that the recipe called for the spices to be removed after the pickles were cooked. She chose to leave the spices in the syrup. The longer they are in the syrup the more intense the flavor becomes. As a compromise my wife made a second batch but this time immediately  removed the cloves. She also used regular rice vinegar rather than sushi vinegar (the regular rice vinegar does not have the sugar the sushi vinegar has). I found these pickles much more tolerable. So should you decide to make these pickles, keep in mind you can adjust the intensity of their flavor by how long the spices remain in the syrup.
As a comparison, my wife found the commercial watermelon rind pickles (picture above). I was amazed you could get a commercial product. Although it looks very similar and texture is the same as my wife's, there is no comparison. The commercial one is just sweet and sour without any taste of spices.
Meanwhile my wife has been looking up other recipes for watermelon pickles on the internet. She found several using different combinations of spices…I’m afraid we will be seeing more of this.

Sunday, August 26, 2012

Salt "koji" pickles 塩麹の浅漬け

I was told that “Shio-koji” 塩麹 is “all the rage” in Japan. Although preserving or marinating vegetables and fish in salt and “koji” is a very old technique, it appears to have made a big come back. I resisted jumping onto the band wagon, until I succumbed at the first sighting of a package of dried koji at the local Japanese grocery store.

Digression alert: Before fermentation can happen, complex carbohydrates or starch have to be converted to fermentable sugars. All cultures somehow figured this out to make alcohol. The most primitive form is to chew cooked grains and spit the masticated starch out into a vessel. Diastase in saliva will convert starch into sugar and fermentation can produce a primitive “jungle” beer.  For true beer making, enzymes formed during sprouting of barley (malting) is used to convert starch in the barley and other grains to sugar (“mash). The Japanese/Chinese figured out that certain mold (yes, “mold” called Aspergillus oryzae, which produce several enzymes including amylase) can convert the starch of cooked rice into fermentable sugar. Many Japanese food items are based on “Koji” to produce; sake 酒, chochu 焼酎, miso 味噌, and shouyu 醤油 (soy sauce).  But koji or cooked rice inoculated with this mold by itself can be used in different dishes. If this was used in pickling or “tsukemono” the vegetables, sugar will mostly ferment into acid (lactic acid by lactobacillus) rather than alcohol. Thus, it imparts sweet (sugar), sour (from lactic acid) and salty (from added slat) and additional “je ne sais quoi”  components from whatever develops during fermentation.
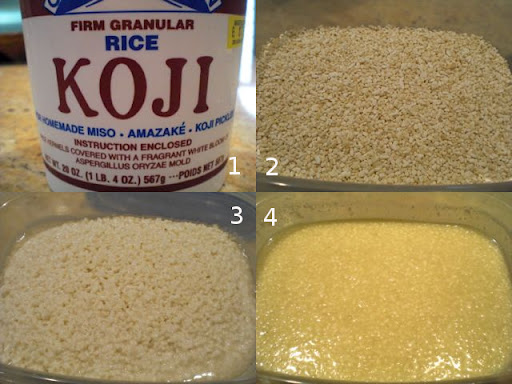
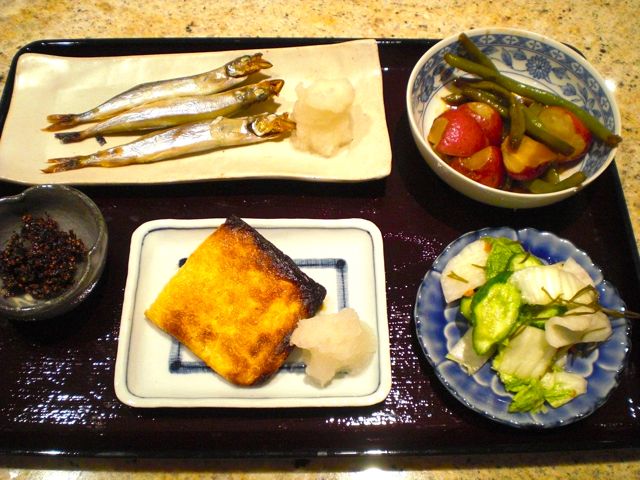
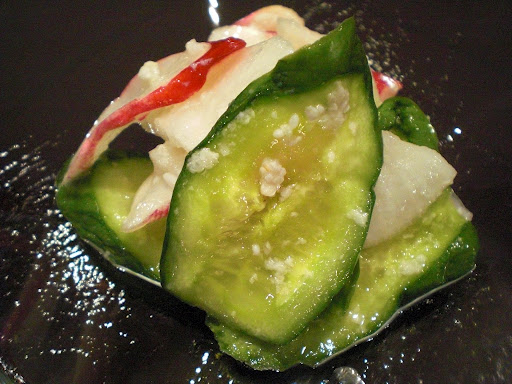
When I was growing up in Hokkaido, there was a fermented and preserved condiment/side dish called “Nishin-zuke” 鰊漬け or Herring pickles (picture below) and my mother used to make it. Essentially, vegetable and filets of dried herrings were mixed with “koji” and salt and left to ferment for several months in a cold place (there were many “cold” places in winter in Hokkaido houses).

nishinzuke
In recent years, “koji” is making a big come back especially as “shio-koji” in Japan as a magical marinade and meat tenderizer. Since I found dried “koji” in the near-by Japanese grocery store, I decided to prepare “shio koji”. After making “shio koji”, this is the first dish I made.

I used daikon cut into quarter circle (1/4 inch thick), cucumber (1/2 inch thick), radish (a kind called “French breakfast” which is small, elongated and a bit sweeter than regular radish with red and white color, cut into thin slices). The amount was totally arbitrary but I weighed the entire amount of the vegetables, and it was about 500 grams. The reason I weighed the vegetables was because the recipe calls for 10% of shiokoji to the weight of the vegetables. I just wanted to get the feel for what constituted 10%  of the weight. I mixed and kneaded the vegetable and shiokoji. The recipe said just massage the vegetables with shiokoji in a Ziploc bag and leave it in a refrigerator for half a day but I decided to use a “Tsukemono” pot with a plunger to apply pressure and left it overnight in the refrigerator until ‘water” came out and submerged the vegetables (or “mizu ga agaru” 水が上がる meaning the water is up).
You could see the fragments of rice kernels from the shiokoji attached to the pieces of vegetables. This is good but we did not think it was all that different from simply salted asazuke 浅漬け. This version adds a slight sweetness and some complexity to the taste. The addition of thinly cut kelp, red pepper, ginger to the simple salted version also can give a different kind of complex flavors to the asazuke. If you already prepared shiokoji, this is a good use for it but I would not make this dish with shiokoji just for the sake of making it.

Shiokoji preparation: I bought pre-made and dried koji and simply followed the instructions that came with the product. As I said you could get the koji mold ( from a home brewing place) and make koji from scratch. In Japan, I was told that a ready made shiokoji is readily available in a jar but I have not seen it sold here in our area. Here, I bought premade and dried koji (#1). I added the amount of water and salt as per the instruction which came with this (#2).
After a few hours, the dried koji absorbed the water and swelled up (#3). I left this container with a lid lightly sealed (with some gap to let the gas escape) on the kitchen counter (room temperature) for 9 days mixing it once a day (#4). It developed some viscosity with a faint slightly sweet smell and the rice kernels got soft and could be crumbled between finger tips easily (#4). I pronounced this “done”, put the lid on tightly and moved it to the refrigerator. According to the instruction sheet, this final product will last at least 6 months in the refrigerator. I suspect you will be seeing this in future preparations.

Saturday, September 24, 2011

Skirt steak and quick "asazuke" vegetable スカートステーキと即席浅漬

Again, this is a nothing dish from leftovers. I usually try to make "asazuke" vegetables on the weekend so that we can eat them during the following week. I did not manage to do that last weekend so I quickly made instant "asazuke". I had a small amount of skirt steak leftover from when I made fajitas. Hence this instant drinking snack.


Instant "azsazuke": I cut a mini-cucumber into small chunks ("rangiri") (one) and daikon into thin, quarter rounds (1 inch segment of medium sized daikon).  I salted, mixed and let stand on the cutting board for 10 minutes or until the excess liquid came out. I squeezed even more excess liquid out using a paper towel.  I put the vegetables into a small Ziploc bag, poured in ponzu-shouyu sauce (from the bottle) and Japanese 7 favored red pepper. I massaged the cucumber from the outside of the bag and let it sit in the refrigerator for 30 minutes before serving.

Skirt steak: I sliced the steak thinly across the grain and mixed with leftover onion and chopped jalapeno pepper (again from the fajitas), grated garlic (from the tube), and soy sauce.

I made skinned Campari tomato cut into flower petal shapes and used it as a center piece with a sprinkling of salt. This is a nothing dish but served as a good starter.

Thursday, August 11, 2011

Asazuke "Mizunasu" Water eggplant 水茄子の浅漬け

This is the second dish (rather preparation) of "mizunasu" 水茄子 I bought the other day. We enjoyed half of it eaten "raw' and made the other half into "Asazuke" 浅漬け.

Instead of my usual way of making asazuke, I used brine (salt water about 4%, slightly saltier than sea water, red pepper flakes, thinly sliced kelp, and chopped ginger). As in "raw" eggplant, I made thin wedges using combination of tearing by hand and cutting with knife. I placed them in the brine in a Japanese pickling pot, cranked down the pressure plate and left them in the refrigerator overnight. 

I served this with asazuke of daikon, cucumber and carrot which I made prior to making the eggplant asazuke. This was very refreshing and we like it. Somehow, the eggplant attained a very slight sliminess on the surface and became softer in texture than we expected. Although this dish was very good, both of us prefer eating "mizunasu" totally "raw". But who knows if or when we will be able to get fresh mizunasu again.

Saturday, October 23, 2010

Japanese Breakfast 日本風朝ご飯

Hangover or "futsuka-yoi" 二日酔い is sometimes an inevitable by-product of the izakaya scene. In my bar hopping days in Japan, hangovers were unavoidable. There are many folk remedies for hangover but their effectiveness is dubious. One such remedy recommended by fellow imbibers while I was living in Japan, was the administration of tomato juice or miso soup--but this never worked for me. Of course, "hair of the dog" or "mukaezake" 迎え酒 (meaning welcoming sake) may be the ultimate cure but it may set you up for the next day's hangover and a vicious cycle may ensue. "Moderation" (what's that) and "hydration" probably are the best way to prevent hangovers.

In any case, you may want to try a traditional breakfast to combat hangovers after having too much fun in Izakayas the night before. Here is my Japanese breakfast but I did not have a hangover and I ate it as supper (Please do not ask why because I don't know why. I had all the ingredients and it just struck my fancy). If you have a hangover, you will feel better after eating this.

 Of course, you need rice and miso soup with any Japanese breakfast.

This example consists of grilled aburaage 焼き油揚げ (top left in the picture below, a bit over done), stewed potatoes and green beans (top right), grilled shishamo 焼きシシャモ (middle left), asazuke 浅漬け (middle right), Perila seedpod tsukudani (bottom left) and miso soup with tofu, wakame sea weed, and aburaage (bottom right).

Other common items include seasoned dried nori (味付け海苔), raw eggs (生卵), natto (納豆), Japanese omelet (卵焼き), and any kind of condiments such as tsukudani (佃煮) of small fish, kelp, and nori.

I am not sure how you feel about eating raw egg over hot rice called "Tamago kake gohan" 卵掛けご飯 (This subject actually appears in Wikipedia--truly amazing!) with a bit of soy sauce (all mixed well), but this is a very popular way to enjoy rice and egg especially in the morning. There is strong following for this dish in Japan with restaurants specializing in it and even a special soy sauce to use on it. (the link is in Japanese).  

Several years ago, we stayed at Kinkazan Shrine/Island 金華山 overnight. Why I decided to visit and stay there is a long story. I think I was expecting to have an experience similar to the lovely time we had at a Buddhist temple in Koyasan 高 野山 a few years earlier. Suffice it to say that was not the case. Just a quick hint; the men's showers had only cold water. Breakfast was served after the morning prayer ceremony (participation in the ceremony was mandatory for all guests--something we didn't know before we arrived). The ceremony occurred at 5:30 AM with 50 or so other fellow worshipers. When we say participate I mean literally. The guests are expected to run part of the ceremony. Luckily I was provided with a crib-sheet of instructions to be learned hastily before going to the main alter in front of all those people to "perform". The priestess conducting the ceremony announced our family name and stated that, as devoted worshipers, we came all the way from Washington, DC. Since I am Japanese (at least from outward appearance), I was expected to sit on the hard floor with legs folded (pure agony) but my wife was provided with a folding stool. In my agony, I didn't think that was quite fair. After the ceremony, all 50 guests were herded into another big room where long bench tables were set with a traditional Japanese breakfast. 

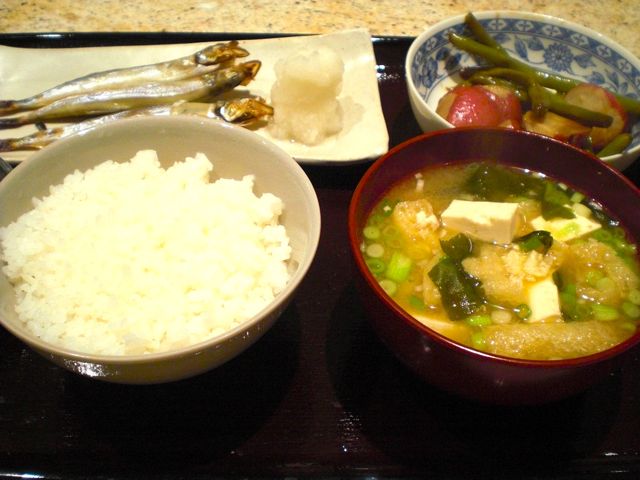
Next to all the usual Japanese breakfast items sat an egg in a small bowl just like the one shown in the picture. While I knew immediately what it was and what it was for, my wife automatically assumed it was a hard boiled egg, something often served in an American breakfast or at Japanese coffee houses. As she was getting ready to smack the egg hard on the table to crack the shell and eat it, something caused her to stay her hand. And a good thing too. Imagine how embarrassing it would have been to deliberately smash a raw egg onto the table while all the other guests, who were Japanese, were managing to get their raw egg onto the rice. How surprised the other guests would have been! It didn't occur to her for even a second that the egg could possibly be raw! Nobody serves a raw egg in the shell for breakfast in the United States (not even our household) !! But she now knows that, in Japan, they do. 

Monday, August 2, 2010

Myouga pickled in sweet vinegar 冥加の甘酢漬 Myouga asazuke 冥加の浅漬

This is probably the last installment of my "myouga" series. This year's crop was not as good as other years but we had enough myouga to enjoy.

The picture below is myouga in sweet vinegar. This is a rather common preparation of myouga and I was told you could get this as a commercial product (in Japan). The recipe is rather simple. I first make sweet vinegar by dissolving sugar in Japanese rice vinegar (I used about 100m of vinegar with 4 tbs of sugar but the proportion is to your taste. I thought this was a bit too sweet but my wife thought it was just fine). I just microwaved it for 30-40 seconds or until the vinegar is warm enough to dissolve the sugar completely. Do not boil, it will make the vinegar less potent. (On the other hand, you may want to gently boil it in a pan to make the sweet vinegar more mellow). I then blanched the cleaned myouga, drained and added it to the sweet vinegar while the myouga are still hot. I keep this in a refrigerator for at least 3 days before eating. The one shown here is about a week old and still nicely crunchy with a sweet vinegar flavor mixed with the distinctive myouga taste. I do not know how long this will keep but I am sure, at least, several weeks. This is perfect for sipping sake or with rice.

This is an assortment of asazuke 浅漬け (cucumber, carrot, daikon, in the back from left to right) and beer marinated daikon (front left) but the main item is, of course, myouga. I made the other vegetables exactly the same way as I posted before but I did not add ginger or hot pepper flakes. In addition to the nice myouga buds, I also added the chopped up stalk of myouga as well. This one has a purely myouga flavor with nice crisp texture.

I think I am running out of myouga recipes. You could of course use finely chopped myouga as a condiment for anything including cold tofu 冷や奴, miso or clear soup, chawanmushi 茶碗蒸し, noodle dishes, sunomono 酢の物 dishes etc.

Friday, June 4, 2010

Salted (pickled) vegetable 浅漬け

Although I have posted this before, I decided to post it again with more details and a better picture. I make this regularly with whatever vegetables are available but cucumber, daikon, nappa cabbage, and celery are the best. I always use thinly sliced and Julienned ginger, red pepper flakes. From time to time, I add different seasonings such as jalapeno pepper, sliced lime or lemon. This time I had thinly cut dried kelp "Kizami konbu" 刻み昆布 (came in a bag) and I used this as well.

It is not really a recipe; just wash and cut any vegetable into an appropriate size and add salt. I slice "hard vegetables" such as daikon, carrot, and radish into rather thin slices. But I slice cucumber (American mini-cucumber) much thicker. If I use regular cabbage, I make the pieces a bit smaller than for nappa cabbage. The amount of salt is important. By weight, about 2% of salt against the total weight of the vegetables is the standard but I tend to use a bit less. After sometime, you can sort of tell the appropriate amount of salt. So I usually do not even measure. I added the vegetables and salt to a bowl with hydrated thinly cut kelp "Kizami konbu"  (after 5 minutes of hydration), and added ginger (finely julienned), red pepper flakes (just enough) and kneaded the mixture with my hand.

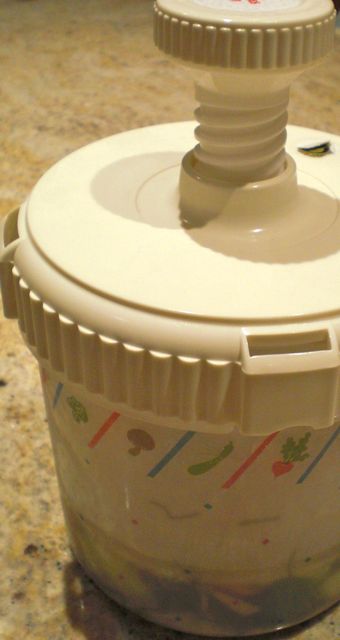
Then I transferred the vegetables to the contraption on the left called a Japanese pickling pot. I put on the lid and screwed down the inner plate so that the vegetables were under some pressure. I placed the pickling pot in the refrigerator. After several hours, you will see water developing above the vegetables. Then, it is ready. If you do not add enough salt, the water may never appear. (This is called "Mizu ga agaru" or "Water has risen"). After this, I transfer the vegetables in a sealable container with its liquid. I drain and squeeze out excess liquid just before serving.

Depending on the saltiness, you could use soy sauce when serving "asazuke". You could try many variations. Depending on the amount of the salt, it will keep at least a week in the refrigerator. We really like this dish. This dish can be served as a small dish which goes well with a sake. You could also serve this as an accompaniment to the rice dish you may serve as a "shime" 締め dish.

Sunday, April 18, 2010

Daikon marinated in beer #2 大根のビール漬け 二回目

As I promised in the prior post on Daikon marinated in beer, I played with the kind of beer I used and types of vegetables. The last time I used Sam Adams Summer Ale which is a more pilsener-like light-colored beer (ale). This time I used Sam Adams Brown Ale which is a bit more robust and darker ale. The proportion of other ingredients is about the same but I used a whole bottle of beer (350ml or 12 oz) and almost proportionally increased the remaining ingredients. Beer (12 oz), rice vinegar (50ml), sugar (100 grams), salt (50 grams), Japanese hot mustard powder (20 grams). Like before, I peeled and cut a daikon into 4-5 inch long pieces and quartered. I used a half of a large daikon. I also added small carrots (2) and mini-cucumber (3).

After 7 days, the daikon and carrot are good but may be a bit too mustardy (especially the daikon). The cucumber was a bit shriveled up. I added a new mini-cucumber and tasted it after one day. The above pictures are one day old cucumber and 8 day old carrot and daikon. All are good but by far, daikon is the best. I will reduce the mustard powder next time and leave cucumber probably for 2 days. This cucumber was not shriveled up but did not have enough flavor penetrated. I am not sure of the difference between the brown and summer ales but the brown ale appears to add more depth to the flavor. Among the vegetables, there is no question that daikon is the best as everybody has indicated.

Saturday, February 6, 2010

Daikon marinated in beer 大根のビール漬け

Tsukemono 漬け物 is always one of the favorites in Izakaya. Most common one is called "asazuke" 浅漬 which I posted in the past. This one is new to me but was mentioned by my niece and she raved about it. I looked for the recipe on the Internet and found quite a few. I am not sure who first invented the dish but this is definitely a new wave tsukemono. There are some variations but after reading these recipes, I decided to base mine on one of them but the amount of sugar looked way too much, so even not knowing how this should taste, I reduced the sugar in half (which, in retrospect, was the right decision). I made a small amount since I never tasted this before.

I mixed the following ingredients in a bowl and poured it in a gallon-size Ziploc bag; 
Beer 180* ml (I used Samuel Adams Summer Ale), rice vinegar 25 ml, salt 20 grams (I used Kosher salt), sugar 50 grams (the origianl called for 100 grams), Japanese hot mustard powder 10 grams. 
I used my electronic scale to weigh these. I am glad my scale had a metric mode. I used about 10 cm long medium daikon, peeled, cut into quarters length wise. I just put into the marinade and into the refrigerator.

We tasted it after 5 days and, then, at 1  and 2 weeks. It mellows out after 1-2 weeks. This is surprisingly good as everyone is saying. The daikon is still very crunchy with a combination of flavors. But, to me, even after cutting the sugar in half, it is still a bit too sweet. My wife said she liked it and did not feel it was too sweet. This one goes well as is as a side while sipping sake and also with rice. I may experiment with different kinds of beer.

P.S. I originally wrorte "90 ml" but it should have been 180ml.

Monday, September 7, 2009

Yakitori 焼き鳥 Part 5

Grilled Rice Ball 焼きおにぎり
Salted vegetables 浅漬け 


This is also our favorite to complete a yakitori meal. Mark's book has a more elaborate version of this old favorite,

Grilled Rice Balls with Vegetable Miso (p148).

You can make this using a frying pan and/or in a toaster oven but you never get the crunchy surface you could get when it is grilled over a direct charcoal fire. I usually use  simple miso paste (white or red miso or a mixture of the two), mirin, add sugar, sesame oil or tahini if you so desire, and heat and mix well to reduce to the original consistency of miso). Of course, you could follow the recipe in the book to make Vegetable Miso. This time, I was too lazy to make the miso mixture and used a mixture of soy sauce and mirin (in equal parts) instead. Just brush it on the rice ball toward end of the cooking process. It will penetrate the surface and further caramelize (because of the sugar in the mirin). It makes a nice crunchy crust and adds flavors. My wife likes it extra crunchy and squeezes lemon over it as she eats it. One of the reasons I like this so much is that this reminds me of "okoge" おこげ  or burned rice in the bottom of a rice cooker when rice is made in the old fashioned way rather than with an electric rice cooker. As a kid, I liked to munch on "okoge" with a bit of miso. My wife likes it because "what is not to like about crunchy on the outside soft and piping hot on the inside".

The small vegetable dish on the side goes well with grilled rice balls or any rice dishes, for that matter. We made a simple  "asazuke".  We cut up cucumber, carrot, Nappa cabbage ("hakusai" 白菜) or regular cabbage, diakon, myoga, radish or whatever vegetables are available.  They can be whatever size you like but not too small or too thin so as to give some texture. I add thinly sliced Jalapeno pepper (seeded and deveined), lime slices, finely minced ginger, red pepper flakes, and/or hydrated thinly sliced kelp ("konbu" 昆布). I add enough salt to sparsely coat the veggies ( I never measure) and mixed well by hand. Place it in a Japanse pickling pot. This can be bought at Amazon or simply use a bowl with a plate which can fit inside and weigh it down with whatever is heavy enough (such as a large unopened jar of pickles). In, at least, 4-5 hours or overnight, a surprising amount of water comes out over the vegetables. Move the vegetables in a plastic container and into a refrigerator. This will last at least several days. Use of Jalapeno pepper and lime is our modification of the basic recipe but works well.